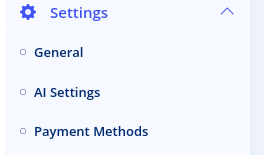
To set General Settings for your portal, go to 'Settings'-'General'. These settings are listed under the 'General' tab on the 'General Settings' page.

Each field listed on this page is described below:
- Site Name: This serves as the name of the site. It usually corresponds to your company name.
- Homepage Title: This is the browser title of the homepage. This title is very important for search engine optimization. You would usually enter text that briefly lists your main services e.g. 'Nanny services, Elderly care, Baby sitters in Lagos'
- Homepage Meta Description Tag: This field is very useful for search engine optimization. It is usually the text that search engines display when your website appears in search engine result pages. Write a short paragraph that briefly describes your services. We recommend you keep the length between 50160 characters.
- Site Email: This is the
default email address that the system uses to send out emails. It is not
displayed on users on the frontend but they will see it if they receive
an email from the portal. Ensure you use a functional email otherwise
you may not receive replies from users.
- Contact Address: Enter your company's contact address here. This is displayed on the 'Contact Us' page of the portal.
- Telephone number: Enter your company's telephone number here. This is displayed on the 'Contact Us' page of the website.
- Contact Email: This should contain your company's contact email. This is displayed on the 'Contact Us' page of the website.
- Enable Employer Registration: Specify if you want employers to be able to register on the site. If you disable this, you can still manually create employers from the backend.
- Enable Candidate Registration: Specify if you want candidates to be able to register on the site. If you disable this, you can still manually create candidates from the backend.
- Header Scripts: In this box, you can place code that should go to the 'Head' section of all your site's frontend pages. Such code could include Google analytics code, Live chat code, Facebook advertising pixel e.t.c
- Footer Scripts: In this box you can place code that should go before the closing tag of all your site's pages.
- Currency Symbol: Enter in
the currency symbol to be used on your site. Whatever symbol you enter
here will be prepended to all prices that are displayed on your portal.
- Currency Name (plural): Enter the name of your currency in plural form and lowercase e.g. dollars, pounds, rand, naira etc.
- Disqus Shortcode: This field is for enabling comments in your blog. If you wish to enable commenting, you'll need to get a shortname from https://disqus.com
- Currency Code: Enter the 3 character currency code for your currency in capital letters e.g. USD, NGN, GBP etc.
- Verify Employer Email?: This determines if employers will need to verify their email addresses before they can create accounts on the portal.
- Verify Candidate Email?: This determines if candidates need to verify their email addresses before they can create accounts on the platform.
- Enable CAPTCHA for employer registration?: If enabled, this prevents registration spam by requiring employers to fill in characters displayed on an image before they can register.
- Enable CAPTCHA for candidate registration?: If enabled, this prevents registration spam by requiring candidates to fill in characters displayed on an image before they can register.
