Order are requests for your services placed by prospective employers. Orders can be created in two ways
- An employer visits your main site (the Frontend) and then fills an order form you created previously.
- You manually create an order on behalf of an employer from the admin area (the Backend)
Orders can have 4 different statuses. These are
- Pending: These usually are orders which have not been attended to yet. It is the default status of all new orders submitted by employers from the Frontend
- In Progress: These are orders that you have started processing. Setting the status to this informs the employer that their order is being worked on.
- Completed: These are orders that have been concluded i.e. candidates have been paired with employers and payment has been received.
- Cancelled: These are orders that were not successfully concluded for whatever reason.
It is important that you update an order as it
progresses through the different stages. Employers can log into their
account an view the status of their orders. They can also get notified
via email as you update their orders.
Manually Creating An Order
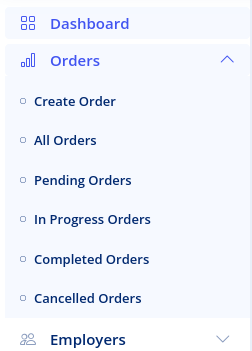
If you wish to manually create an order for an employer, click on the 'Orders'-'Create Order' link
This opens the Orders page and a dialog appears, prompting you to select a form.
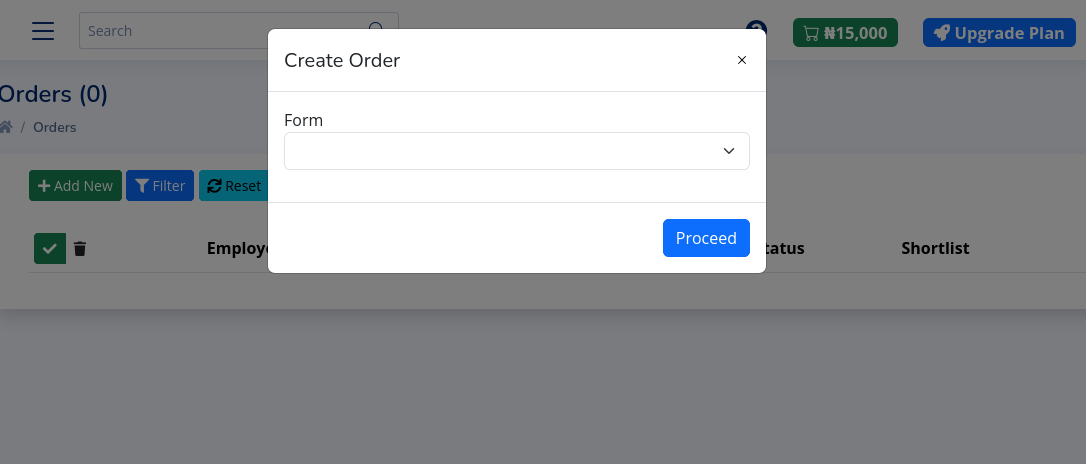
Select a form you have created previously from the dropdown option. Then Click on 'Proceed'. The order creation page will open
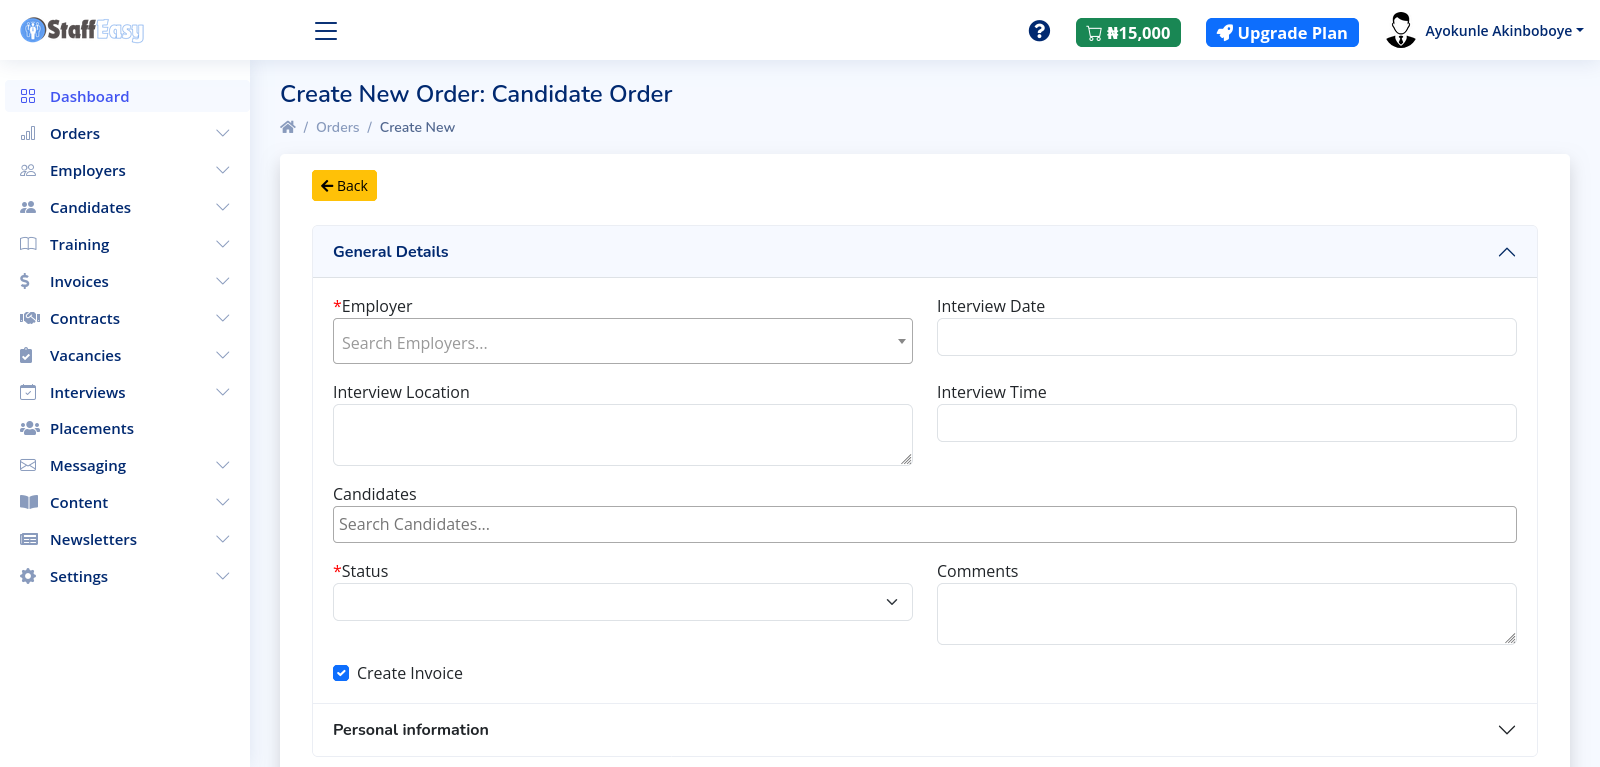
Fill in all the details required in order to create an order. Select your employer from the dropdown by typing either the name or email of the employer. You can also shortlist candidates for this order by typing the list of candidates in the 'Candidate' box. You can add as many candidates as you wish.
Note the 'Create' invoice checkbox. If selected, you can create an invoice automatically based on your 'Automatic invoice' settings (learn more about that here). Click on the 'Create' button in order to create your new order.
Managing Orders
To manage existing orders, click on any of the links
(except 'Create Order') under the 'Orders' menu corresponding to the
type of order you wish to view.

This brings up the corresponding list of orders

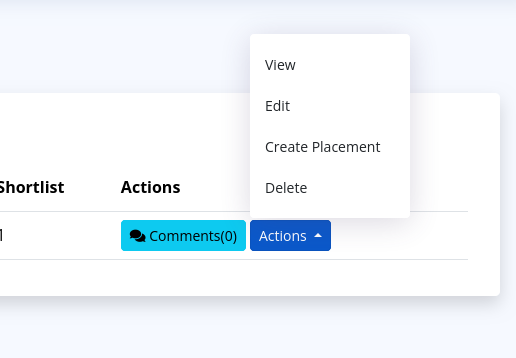
Each order has two buttons: 'Comments' and 'Actions'
The 'Comments' button leads to a page where you can manage all order comments for this order. Each order can have an unlimited number of comments. Comments can be created both by the Admin and the Employer. This provides an easy location where you can provide updates to the employer about their order.

When you create a comment, the employer can get notified immediately via email. Click on the 'Add New' button on the comments page in order to add a new comment. You can also add attachments to your comments.
The 'Actions' button provides options for viewing, editing and deleting an order. There is also a 'Create Placement' button. This enables you easily create a 'Placement' record after an order has been completed successfully. See the 'Managing Placements' help page for more information on placements.
Clicking on the 'View' action option leads to the page were you can get a full view of the order
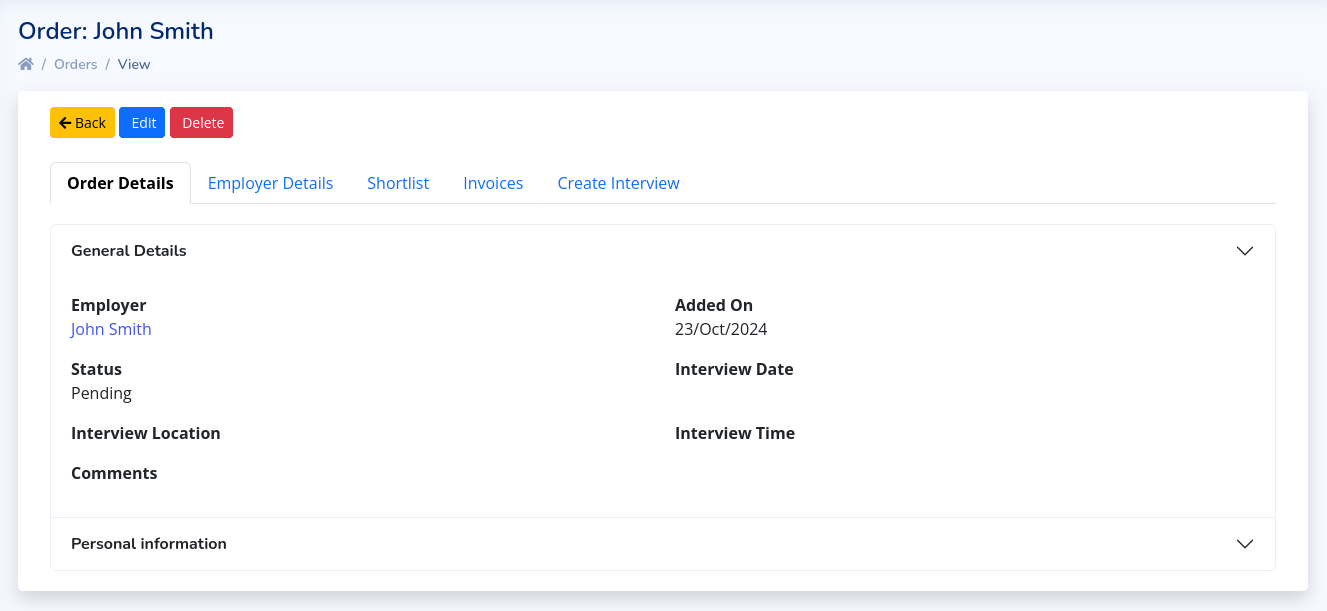
The order viewing page contains different tabs. There is the 'Order Details' tab which shows the specific details of this order, the 'Employer Details' tab which shows you the full details of the employer, the 'Shortlist' tab which shows you the candidates shortlisted for this order (if available), the 'Invoices' tab which shows invoices that were created for this order and the 'Create Interview' tab which enables you easily schedule an interview for the employer who placed this order (See the help page for managing interviews for more information).
One thing to note about the 'Invoices' tab is that
you can create new Invoices here. Invoices created using the 'Add new'
button in this tab will be associated with this order only. We recommend
you create Order related invoices this way as it helps you organize
your invoices.
